


How to Make Resin Jewelry: DIY Guide
“Resin Jewelry: Dive into the fascinating world of resin jewelry making. Learn essential techniques, from mixing to molding, to craft unique and beautiful pieces. Explore your creativity today!”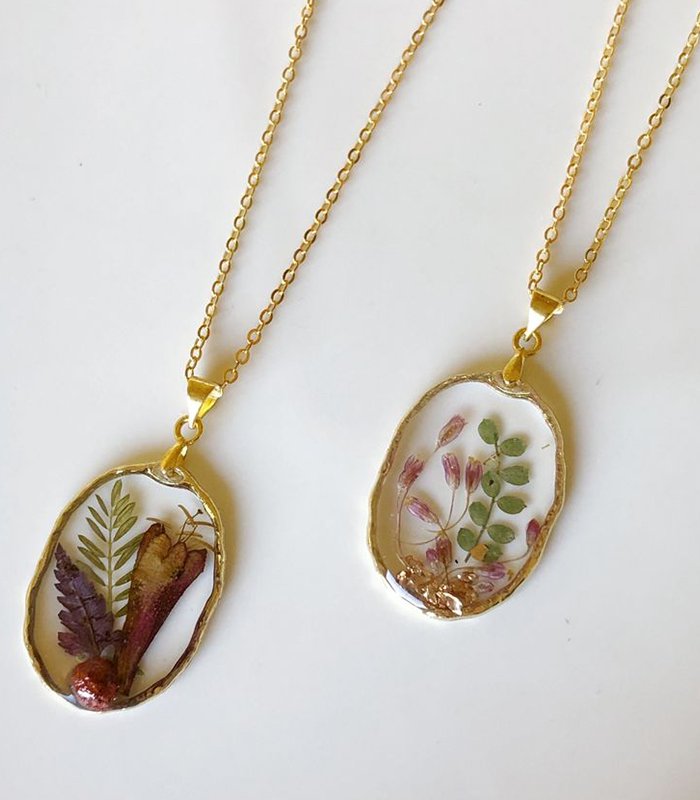
Materials Resin Jewelry:
- Resin: Choose a jewelry-grade epoxy resin. There are various brands available, so follow the instructions on the product you choose.
- Molds: You can use silicone molds designed for resin casting. They come in various shapes and sizes.
- Mixing Cups: Use disposable cups for measuring and mixing resin. Make sure they are clean and free from any contaminants.
- Stir Sticks: Wooden or plastic stir sticks work well. Avoid metal as it can introduce air bubbles.
- Pigments and Dyes: If you want to add color to your resin, use pigments or dyes specifically designed for resin. You can mix colors to create custom shades.
- Inclusions: Consider adding small objects like flowers, glitter, or small charms to create unique designs.
- Mold Release: If you’re using intricate molds, a mold release agent can help in demolding.
- Safety Gear: Wear gloves and work in a well-ventilated area to avoid skin contact and inhaling fumes.
Steps:
-
Prepare your workspace:
- Cover your work surface with plastic or a silicone mat to catch any spills.
- Make sure the area is well-ventilated.
-
Mix the resin:
- Follow the instructions on your resin product for the correct mixing ratio. Usually, it’s a 1:1 ratio of resin and hardener.
- Stir the mixture thoroughly but gently to minimize the introduction of air bubbles.
-
Add color:
- If you want colored resin, add pigments or dyes. Mix well until the color is uniform.
-
Pour into molds:
- Pour the mixed resin into your chosen molds. Be careful not to overflow.
-
Add inclusions:
- If you’re incorporating objects, place them into the resin at this stage. Arrange them as desired.
-
Remove bubbles:
- Use a heat gun or a kitchen torch to remove any air bubbles that rise to the surface. Pass the flame quickly over the surface without overheating.
-
Curing:
- Follow the curing time specified by the resin manufacturer. It typically takes 24-48 hours for the resin to fully cure.
-
Demold:
- Once cured, carefully remove the resin pieces from the molds. If using a mold release agent, this step should be easier.
-
Finish:
- Sand any rough edges using fine-grit sandpaper.
- Polish the resin using a polishing compound or a resin-specific polish.
Tags:
Related articles

DIY Glass Bottle Painting with Glass bottle art
Sep 30 2024

How to Shape Resin to Form a Bowl
Sep 18 2024


Discover the Best Resin Art Course for Beginners
Sep 09 2024


1 comment
Yeah, it’s very useful. thanks for this information.